WPElitePlugins Updater
Documentation, Reference Materials and Tutorials
Installation
The WPElitePlugins Updater enables 2-click updates for Plugins when you activate your license key through the WordPress Dashboard.
To install the plugin:
- Download the plugin (.zip file)
- Go to Plugins > Add New
- Click the Uploads tab and upload the file
Usage
After installation you can access the admin screen by going to Dashboard > WPElitePlugins Updater.

You will be presented with an admin page where you can add your license keys and your email address.
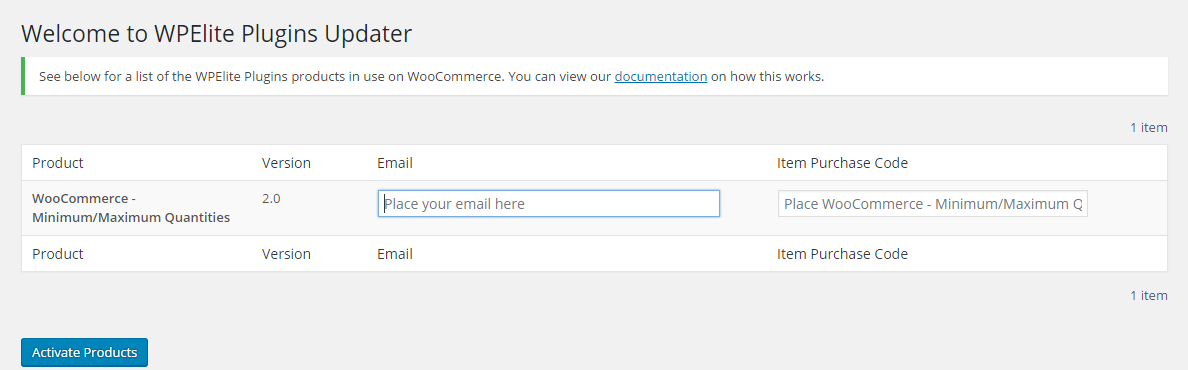
Adding License Keys
On the Licenses admin screen, you should see all your installed products, with an option to add your license key and your email address.
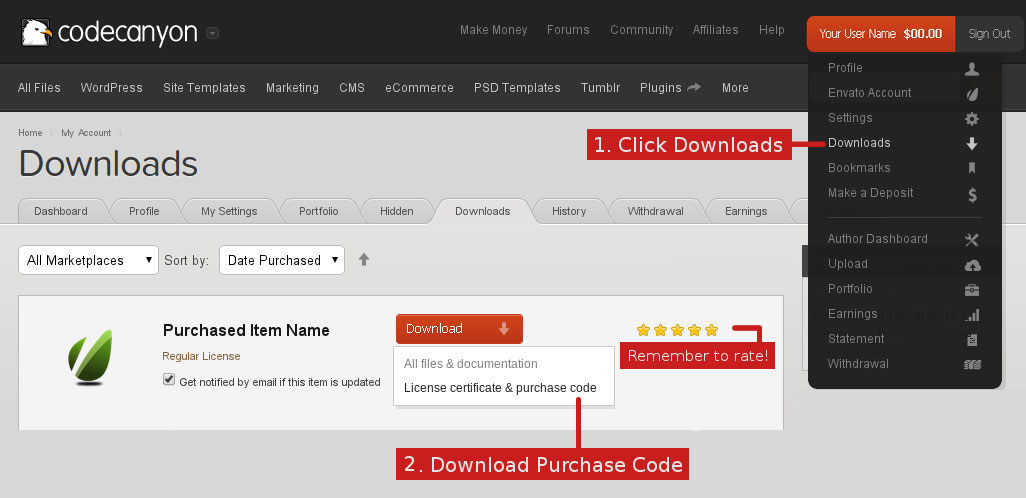
To add a license key Log into your codecanyon account and navigate to your downloads tab. Find the Social Auto Poster Plugin purchase and click the "Download" button next to it. Choose "License Certificate & Purchase Code" which will download a text file. Open the text file and look for the "Purchase Code" inside. Copy and paste the code into the Paste the license key into input field for your product. Click Here To See.
Once you have activated your product, you've be able to update your product via the Dashboard > Updates admin screen.
Common Issues
Common issues with the WPElitePlugins Updater may include:
WPElitePlugins Updater itself isn't updating.
This could be your server blocking connections to wpeliteplugins.com via a firewall of sorts. The best solution is to check with your web host.
My updates aren't showing.
Either you haven't activated a license key, or the server is blocking the connection. This could be your server blocking connections to wpeliteplugins.co.in via a firewall of sorts. The best solution is to check with your web host.
Can't find the answer you are looking for?
If you have any questions that are which are not listed in documentation, Feel free to get in touch with us on wpeliteplugins@gmail.com